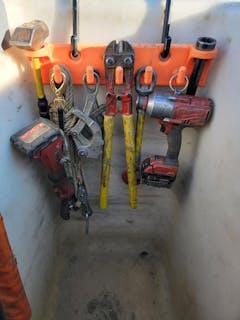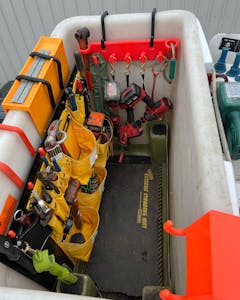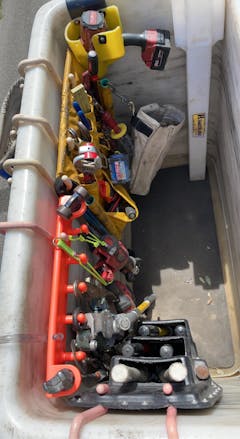

Helps bucket truck workers stay hydrated, organized, and accessible with a phone/radio compartment. The hooks are extra large for tools and hoists. Fits 3" Bucket Lips
4 Tools in 1 + 4”x6” Magnet
- Reduces heat-related illnesses by keeping workers hydrated
- Item number: 1002
- Fits on a 3" Bucket Lip
- Now comes with 4” x 6” Magnet
- Extra-large compartment for large radios and phones
- Multi-size cupholder keeps workers hydrated
- Extra large hooks to hold tool pouches and/or larger tools or equipment
- Efficient use of space
- Total working load limit 100lbs (50lbs per hook)
- Made of a durable proprietary polymer + UV protectant
- Now Patented
- One (1) Year Limited Warranty
- Always follow manufacturers guidelines on Elevated Work Platforms Load Ratings
-
Only use for Interior Placement of tools and accessories
ATTENTION
##Magnet Facts and How To Remagnetize ##
While occasional brief exposure to power lines may not cause significant damage, being within a foot or two of them for hours each week will likely lead to gradual and noticeable demagnetization over time. If maintaining the magnet’s strength is crucial, it would be wise to keep it at a greater distance from the powerlines or shield it from the magnetic fields if possible.
**Avoid Dropping:** Dropping a magnet can disrupt its magnetic alignment, weakening it over time.
Avoid Excessive Heat:** High temperatures can cause magnets to lose their magnetism.
Remagnetizing thin, flat adhesive-backed magnets requires a few careful steps. Here’s a guide on how you can do it:
Materials Needed:
1. Strong Neodymium Magnet - You’ll need a stronger magnet to re-magnetize the weaker adhesive-backed magnet.
2. Gloves (optional) - Neodymium magnets are powerful, so using gloves can protect your hands.
3. Clean Workspace - Ensure your workspace is free from metal debris as the strong magnet will attract them.
Steps:
1. Identify the Magnetic Pole:
• Determine the north and south poles of both the neodymium magnet and the adhesive-backed magnet.
• You can do this using a compass or another known magnet. Typically, opposite poles attract, while like poles repel.
2. Align the Magnets:
• Place the strong neodymium magnet on the corresponding pole of the adhesive-backed magnet. For instance, if the north pole of the adhesive magnet needs to be stronger, place the south pole of the neodymium magnet over it.
3. Magnetize the Adhesive-Backed Magnet:
• Slowly move the neodymium magnet over the surface of the adhesive-backed magnet several times. Ensure the direction of your stroke is consistent to align the magnetic domains properly.
• You should feel a slight pull as you pass the strong magnet over the adhesive-backed magnet.
4. Test the Magnetism:
• After a few passes, test the adhesive-backed magnet by placing it near metal objects to see if its magnetism has improved.
• If it hasn’t, repeat the process until you achieve the desired level of magnetism.
5. Secure the Magnet:
• Once remagnetized, handle the adhesive-backed magnet carefully to avoid demagnetizing it again. Place it back in the desired position on your project or surface.
Additional Tips:
• Avoid Excessive Heat: High temperatures can cause magnets to lose their magnetism, so avoid exposing them to heat.
• Avoid Dropping: Dropping a magnet can disrupt its magnetic alignment, weakening it over time.
If the magnet is too weak after several attempts, it may be necessary to replace it.


